이번 시간에는 지난 시간에 구축한 AWS S3 서버를 이용해서 spring boot app으로 파일 업로드, 삭제, 다운로드 등을 어떻게 하는지 살펴보겠습니다. 아직 S3를 구축하지 못했다면 지난 글을 참고해서 S3를 구축합니다.
S3를 이용한 이미지 서버 만들기 - I
AWS S3(Amazon Simple Storage Service)는 Amazon Web Services(AWS)에서 제공하는 객체 스토리지 서비스입니다. 이번 시간에는 S3를 이용해서 이미지 서버를 만드는 방법에 대해서 살펴보겠습니다. 1. S3 검색 및
hoazzinews.tistory.com
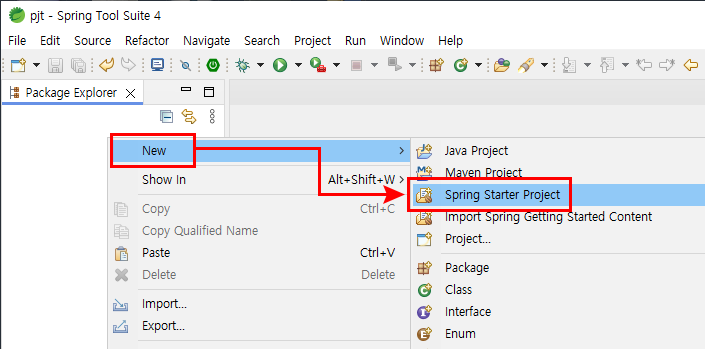
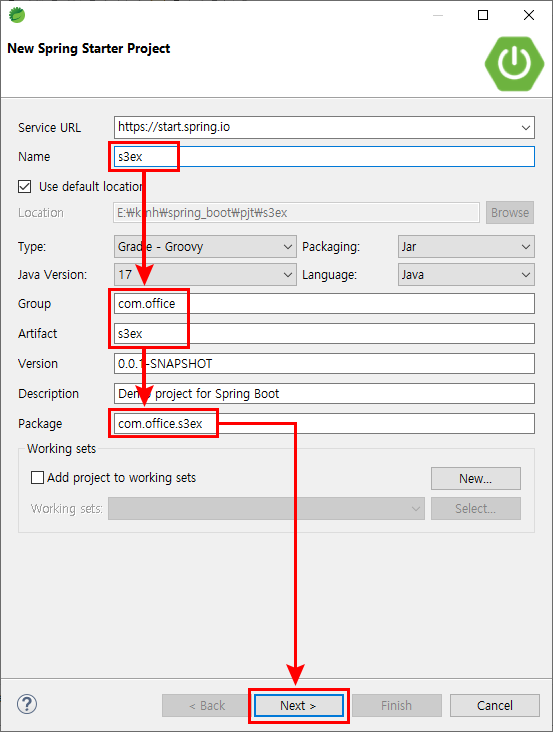
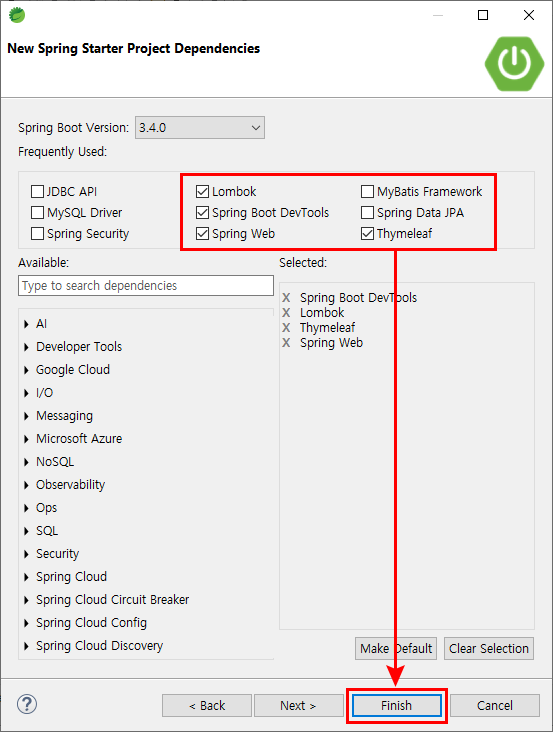
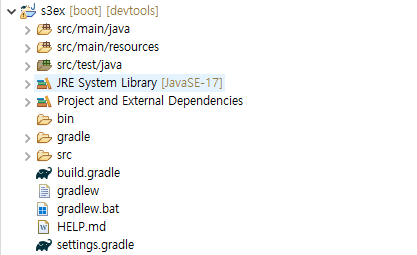
1. spring boot 프로젝트 만들기
2. 의존 모듈 설치
aws s3를 사용하기 위해서 필요한 의존모듈을 설치합니다. build.gradle 파일을 open해서 추가합니다.
dependencies {
	implementation 'org.springframework.boot:spring-boot-starter-thymeleaf'
	implementation 'org.springframework.boot:spring-boot-starter-web'

	// aws-java-sdk-s3
	implementation 'software.amazon.awssdk:s3:2.20.47'
	implementation 'software.amazon.awssdk:auth:2.20.47'
    	implementation 'software.amazon.awssdk:core:2.20.47'

	compileOnly 'org.projectlombok:lombok'
	developmentOnly 'org.springframework.boot:spring-boot-devtools'
	annotationProcessor 'org.projectlombok:lombok'
	testImplementation 'org.springframework.boot:spring-boot-starter-test'
	testRuntimeOnly 'org.junit.platform:junit-platform-launcher'
}
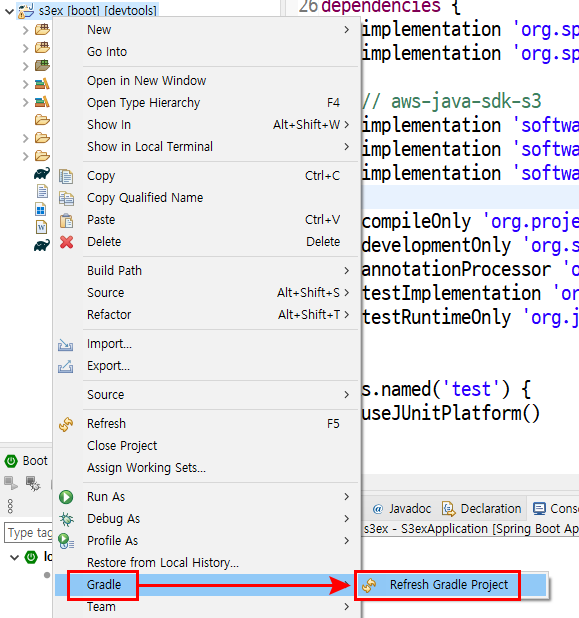
모듈을 설치하기 위해서 gradle을 refresh합니다.
3. 애플리케이션 변수 선언
애플리케이션 변수들을 설정하기 위해서 application.properties 파일 open하고 thymeleaf, aws s3와 관련된 변수를 선언합니다.
spring.application.name=s3ex

# Tomcat
server.port=8090

# Dev Tools
spring.devtools.restart.enabled=true

# Thymeleaf
spring.thymeleaf.cache=false
spring.thymeleaf.prefix=classpath:/templates/
spring.thymeleaf.suffix=.html
spring.thymeleaf.check-template-location=true

# AWS S3
aws.s3.bucket=s3ex-bucket
aws.s3.accessKey=AWS S3 액세스 키
aws.s3.secretKey=AWS S3 비밀 액세스 키
aws.s3.client=myS3Client
aws.s3.region=ap-northeast-2
- aws.s3.bucket=s3ex-bucket: 버킷 이름
- aws.s3.accessKey=액세스 키
- aws.s3.secretKey=비밀 액세스 키
- aws.s3.client=클라이언트 이름(개발자가 임의로 만듦)
- aws.s3.region=ap-northeast-2: 지역코드(AWS에서 확인할 수 있음.)
4. UploadedFileInfo 클래스 생성
package com.office.s3ex;

import lombok.AllArgsConstructor;
import lombok.Data;
import lombok.NoArgsConstructor;

@Data
@NoArgsConstructor
@AllArgsConstructor
public class UploadedFileInfo {

    private String fileUrl;			// 업로드한 파일 URL
    private String fileName;		// 업로드한 파일 이름

}
UploadedFileInfo 클래스의 fileUrl은 s3에 업로드된 파일의 경로이고, fileName은 파일 이름을 나타내는 멤버 필드입니다.
5. S3FileService 클래스 생성
가장 중요한 클래스로 s3에 파일을 업로드하고 삭제 그리고 다운로드하는 메서드가 있습니다.
package com.office.s3ex;

import java.io.ByteArrayOutputStream;
import java.io.InputStream;
import java.util.UUID;

import org.springframework.beans.factory.annotation.Value;
import org.springframework.stereotype.Component;
import org.springframework.web.multipart.MultipartFile;

import lombok.extern.slf4j.Slf4j;
import software.amazon.awssdk.auth.credentials.AwsBasicCredentials;
import software.amazon.awssdk.auth.credentials.StaticCredentialsProvider;
import software.amazon.awssdk.core.ResponseInputStream;
import software.amazon.awssdk.core.sync.RequestBody;
import software.amazon.awssdk.regions.Region;
import software.amazon.awssdk.services.s3.S3Client;
import software.amazon.awssdk.services.s3.model.DeleteObjectRequest;
import software.amazon.awssdk.services.s3.model.GetObjectRequest;
import software.amazon.awssdk.services.s3.model.GetObjectResponse;
import software.amazon.awssdk.services.s3.model.GetUrlRequest;
import software.amazon.awssdk.services.s3.model.ObjectCannedACL;
import software.amazon.awssdk.services.s3.model.PutObjectRequest;

@Slf4j
@Component
public class S3FileService{

	final private S3Client s3Client;

	@Value("${aws.s3.bucket}")
	private String bucket;

	public S3FileService(
			@Value("${aws.s3.accessKey}") String accessKey,
			@Value("${aws.s3.secretKey}") String secretKey,
			@Value("${aws.s3.region}") String region) {
		log.info("S3FileService()");

		// AWS 자격증명 설정
		AwsBasicCredentials awsCredentials = AwsBasicCredentials.create(accessKey, secretKey);

		// S3 클라이언트 설정
        s3Client = S3Client.builder()
                .region(Region.of(region))  // region 설정
                .credentialsProvider(StaticCredentialsProvider.create(awsCredentials))
                .build();


	}

	// 파일 업로드
	public UploadedFileInfo uploadImage(MultipartFile multipartFile) {
		log.info("uploadImage()");

		 // 파일 확장자 포함한 고유 이름 생성
        UUID uuid = UUID.randomUUID();
        String uniqueFileName = uuid.toString().replaceAll("-", "");

        String fileOriName = multipartFile.getOriginalFilename();
        String fileExtension = fileOriName.substring(fileOriName.lastIndexOf(".")); // 확장자 추출

        String fileName = uniqueFileName + fileExtension;

		try {
			// PutObjectRequest로 S3에 파일 업로드
            PutObjectRequest putObjectRequest = PutObjectRequest.builder()
                    .bucket(bucket)
                    .key(fileName)
                    .acl(ObjectCannedACL.PUBLIC_READ)  // 공개 읽기 권한
                    .contentType(multipartFile.getContentType())
                    .build();

            // 파일 업로드
            s3Client.putObject(putObjectRequest, RequestBody.fromInputStream(multipartFile.getInputStream(), multipartFile.getSize()));

            // 업로드한 파일의 URL
            String fileUrl = s3Client.utilities().getUrl(GetUrlRequest.builder().bucket(bucket).key(fileName).build()).toString();

            // 업로드한 파일의 URL 과 Name 반환
            return new UploadedFileInfo(fileUrl, fileName);

		} catch (Exception e) {
			e.printStackTrace();

		}

        return null;

    }

	// 파일 삭제
	public boolean deleteImage(String fileName) {
		log.info("deleteImage()");

		try {
			// S3에서 객체 삭제
            DeleteObjectRequest deleteObjectRequest = DeleteObjectRequest.builder()
                    .bucket(bucket)
                    .key(fileName)
                    .build();
            s3Client.deleteObject(deleteObjectRequest);
            return true;

		} catch (Exception e) {
			e.printStackTrace();

		}

		return false;

	}

	// 파일 다운로드
	public byte[] downloadImage(String fileName) {
        log.info("downloadImage()");

        try {
        	// S3에서 객체를 가져오기 위한 GetObjectRequest
            GetObjectRequest getObjectRequest = GetObjectRequest.builder()
                    .bucket(bucket)
                    .key(fileName)
                    .build();

            // S3에서 파일을 다운로드 (ResponseInputStream으로 반환됨)
            ResponseInputStream<GetObjectResponse> response = s3Client.getObject(getObjectRequest);

            // 파일 내용을 ByteArray로 읽어들입니다.
            InputStream inputStream = response;
            ByteArrayOutputStream byteArrayOutputStream = new ByteArrayOutputStream();
            byte[] buffer = new byte[1024];
            int length;
            while ((length = inputStream.read(buffer)) != -1) {
                byteArrayOutputStream.write(buffer, 0, length);
            }

            inputStream.close();
            byteArrayOutputStream.close();

            return byteArrayOutputStream.toByteArray();

		} catch (Exception e) {
			e.printStackTrace();

		}

        return null;

	}

}
- S3FileService(): 생성자로 accessKey, secretKey, region을 이용해서 AWS 자격 증명(인증)과 s3 클라이언트(s3Client)를 설정합니다.
- uploadImage(): 파일을 s3에 업로드하고 정상적으로 업로됐다면 UploadedFileInfo 객체를 만들어서 반환합니다.
- deleteImage(): s3의 파일을 삭제합니다.
- downloadImage(): s3의 파일을 다운로드 합니다.
6. HomeController 클래스 생성
컨트롤러 클래스로 사용자로부터 파일 '업로드', '삭제', '다운로드' 요청을 받아서 서비스(S3FileService)에 전달합니다.
package com.office.s3ex;

import org.springframework.http.HttpHeaders;
import org.springframework.http.ResponseEntity;
import org.springframework.stereotype.Controller;
import org.springframework.ui.Model;
import org.springframework.web.bind.annotation.GetMapping;
import org.springframework.web.bind.annotation.PostMapping;
import org.springframework.web.bind.annotation.RequestParam;
import org.springframework.web.bind.annotation.ResponseBody;
import org.springframework.web.multipart.MultipartFile;

import lombok.extern.slf4j.Slf4j;

@Slf4j
@Controller
public class HomeController {

	final private S3FileService s3FileService;

	public HomeController(S3FileService s3ImageUploader) {
		this.s3FileService = s3ImageUploader;

	}

	@GetMapping({"", "/"})
	public String home() {
		log.info("home()");

		return "home";

	}

	@PostMapping("/file_upload")
	public String fileUpload(@RequestParam(value="profile", required = false) MultipartFile file,
			Model model) {
		log.info("fileUpload()");

		UploadedFileInfo uploadedFileInfo = s3FileService.uploadImage(file);
		model.addAttribute("uploadedFileInfo", uploadedFileInfo);

		return "home";

	}

	@GetMapping("/file_delete")
	public String fileDelete(@RequestParam("file_name") String fileName, Model model) {
		log.info("deleteDelete()");

		boolean deleteResult = s3FileService.deleteImage(fileName);
		model.addAttribute("deleteResult", deleteResult);

		return "home";

	}

	@GetMapping("/file_download")
	@ResponseBody
	public ResponseEntity<byte[]> fileDownload(@RequestParam("file_name") String fileName) {
		log.info("/fileDownload()");

		byte[] imageData = s3FileService.downloadImage(fileName);

		if (imageData == null)
            return ResponseEntity.notFound().build();

		// 파일의 Content-Type (이미지 파일의 경우 이미지 MIME 타입을 사용)
        HttpHeaders headers = new HttpHeaders();
        headers.add(HttpHeaders.CONTENT_DISPOSITION, "attachment; filename=" + fileName);
        headers.add(HttpHeaders.CONTENT_TYPE, "application/octet-stream");

        // 이미지 파일을 HTTP 응답으로 반환
        return ResponseEntity.ok()
                .headers(headers)
                .body(imageData);

	}

}
- fileUpload(): 파일 업로드 요청을 처리하고 응답 합니다.
- fileDelete(): 파일 삭제 요청을 처리하고 응답 합니다.
- fileDownload(): 파일 다운로드 요청을 처리하고 응답 합니다.
필요한 클래스는 모두 만들었습니다. 다음으로 뷰를 만들어서 컨트롤러에 요청을 보내고 응답을 받아보겠습니다.
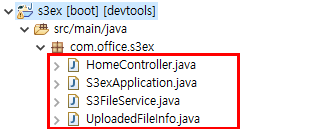
다음은 클래스 구조 입니다.
7. 뷰(home.html) 만들기
templates에 home.html을 만들고 다음과 같이 코딩합니다.
<!DOCTYPE html>
<html xmlns:th="http://www.thymeleaf.org">
<head>
<meta charset="UTF-8">
<title>s3ex</title>
<script th:inline="javascript">
/* <![CDATA[ */
let uploadedFileInfo = /*[[${uploadedFileInfo}]]*/ {};
let fileName = (uploadedFileInfo !== null) ? uploadedFileInfo.fileName : null;
let deleteResult = /*[[${deleteResult}]]*/ false;
/* ]] */
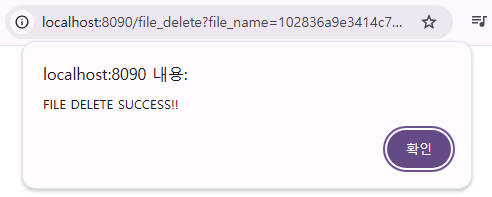
if (deleteResult === true)
alert('FILE DELETE SUCCESS!!');
//삭제 요청을 서버로 보냄
function deleteFile() {
window.location.href = '/file_delete?file_name=' + fileName; // 삭제 URL
}
// 다운로드 요청을 서버로 보냄
function downloadFile() {
window.location.href = '/file_download?file_name=' + fileName; // 다운로드 URL
}
</script>
</head>
<body>
<!-- 파일 업로드 -->
<form th:action="@{/file_upload}"
method="post"
enctype="multipart/form-data">
<input type="file" name="profile">
<input type="submit" value="submit">
</form>
<!-- uploadedFileInfo가 존재할 때만 이미지와 파일 이름을 표시 -->
<div th:if="${uploadedFileInfo != null}">
<img th:src="${uploadedFileInfo.fileUrl}" /><br>
<span th:text="${uploadedFileInfo.fileName}"></span><br>
<!-- 파일 삭제 및 다운로드 버튼 -->
<button onclick="deleteFile()">FILE DELETE</button>
<br>
<button onclick="downloadFile()">FILE DOWNLOAD</button>
</div>
</body>
</html>
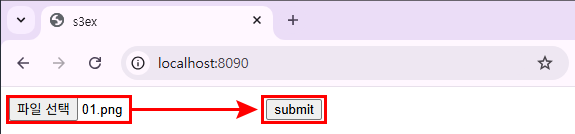
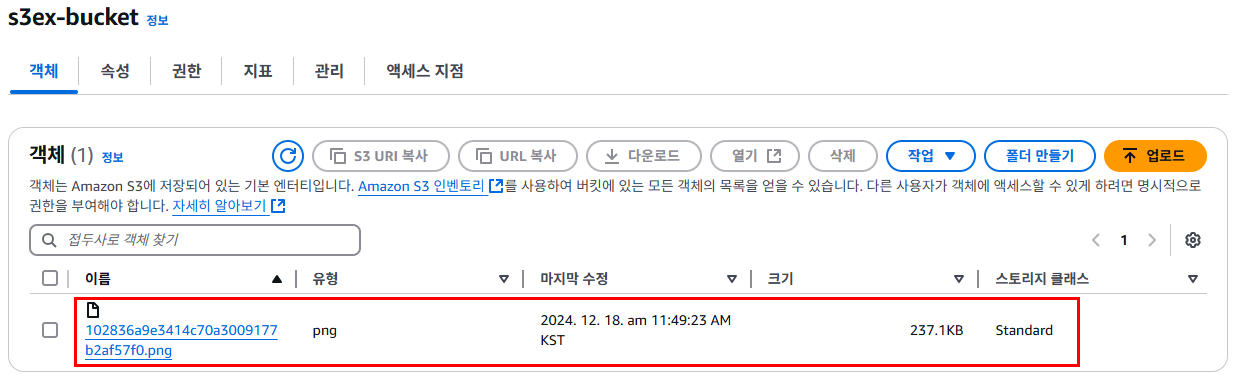
8. 파일 업로드 및 S3 버킷 확인
애플리케이션 실행 후 파일을 업로드합니다.
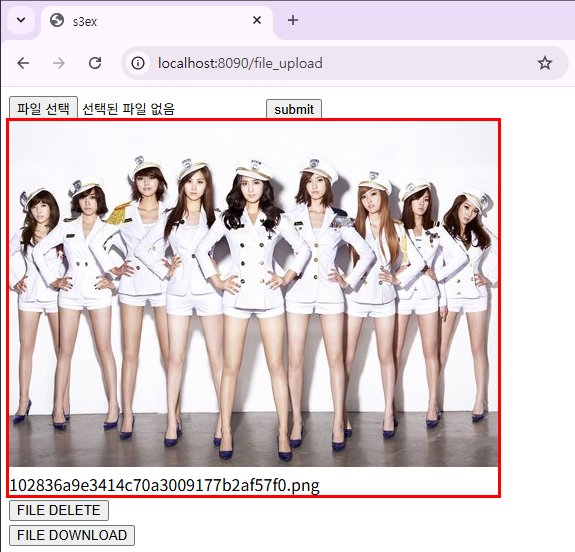
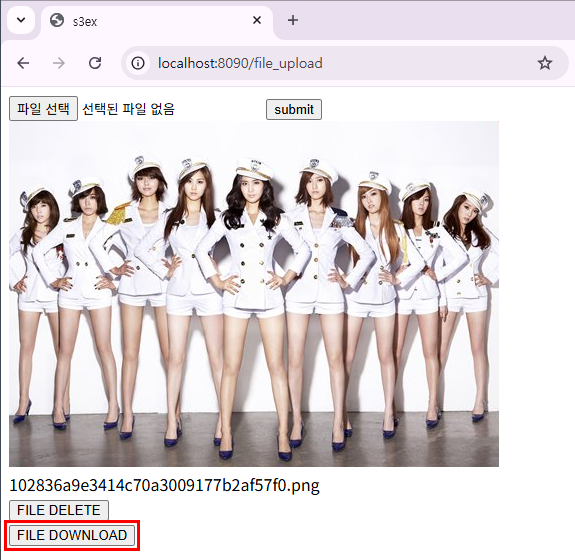
9. 파일 다운 로드 및 삭제
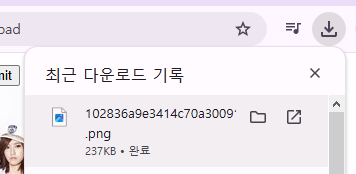
'FILE DOWNLOAD' 버튼을 클릭해서 S3에 업로드한 파일을 다운로드 합니다.
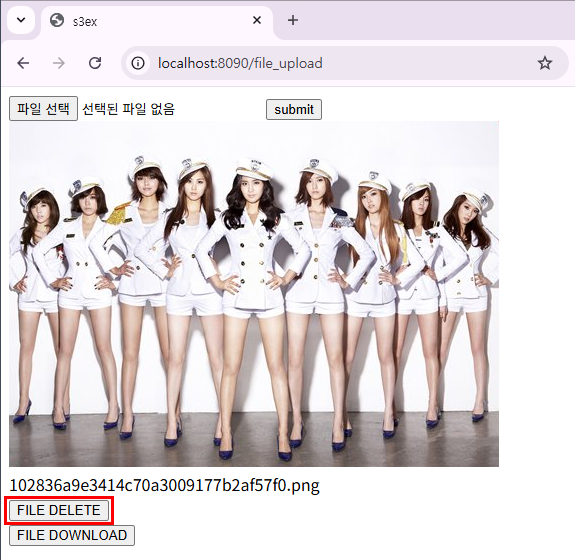
'FILE DELETE' 버튼을 클릭해서 S3에 업로드한 파일을 삭제 합니다.
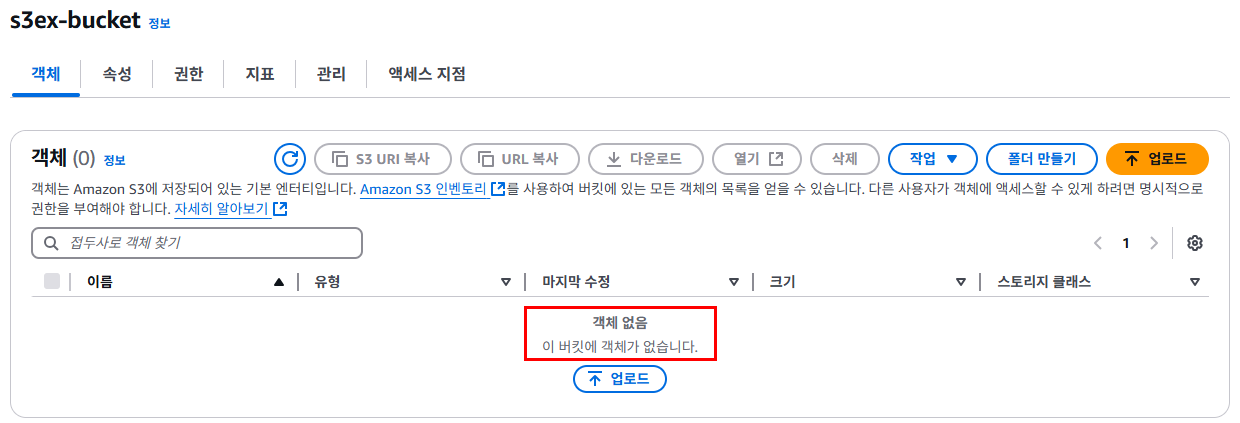
이번 시간에는 spring boot app에서 s3 버킷을 이용하는 방법에 대해서 살펴봤습니다.
전체 소스 첨부합니다.
'aws' 카테고리의 다른 글
| AWS S3에 파일 업로드, 다운로드, 삭제하기(feat. node.js) (0) | 2024.12.21 |
|---|---|
| S3를 이용한 이미지 서버 만들기 (3) | 2024.12.17 |
| AWS RDS MySQL을 사용할 때 외부 IP 접근을 설정하는 방법과 차이점 (0) | 2024.12.01 |
| AWS RDS 서버 만들기 (0) | 2024.11.25 |
| putty를 이용해서 AWS EC2에 접속하기 (0) | 2024.11.25 |