
왜 Docker 환경에서 파일을 Ubuntu 디렉터리에 따로 저장해야 할까?
Spring Boot 애플리케이션을 Docker로 배포하면, 우리가 실행하는 애플리케이션은 컨테이너(Container) 안에서 동작하게 됩니다. 이때 가장 많이 놓치는 부분이 바로 "파일 저장 위치"입니다.
컨테이너 내부에 파일을 저장하는 것은 얼핏 보면 문제 없어 보이지만, 실제 운영 환경에서는 다음과 같은 문제가 발생합니다.
1. 컨테이너는 언제든지 사라질 수 있다
Docker 컨테이너는 일회성 환경입니다.
컨테이너를 삭제하고 다시 실행하면 내부에 저장된 파일도 함께 사라집니다.
즉,
- 사용자가 업로드한 이미지
- 첨부파일
- 기타 데이터
이 모든 것이 컨테이너 재시작 시 유실될 수 있습니다.
2. 컨테이너 업데이트 시 데이터가 날아간다
Spring 앱을 수정하고 다시 배포하는 과정에서 보통 다음과 같은 흐름이 발생합니다.
- 기존 컨테이너 삭제
- 새로운 이미지로 컨테이너 생성
이 과정에서 컨테이너 내부에 저장된 파일은 유지되지 않습니다.
결국 파일 데이터와 애플리케이션이 강하게 묶여버리는 문제가 생깁니다.
3. 서버(호스트)와 데이터를 분리해야 안정적이다
그래서 실무에서는 다음과 같은 구조를 사용합니다.
- 애플리케이션 → Docker 컨테이너 내부에서 실행
- 업로드 파일 → Ubuntu 서버(호스트)의 특정 디렉터리에 저장
예를 들어:
이렇게 하면,
- 컨테이너를 삭제해도 파일은 그대로 유지되고
- 여러 컨테이너가 같은 파일을 공유할 수도 있으며
- 백업 및 관리도 훨씬 쉬워집니다.
4. Docker의 “볼륨(Volume)” 개념
Docker에서는 이를 해결하기 위해 볼륨(Volume) 또는 바인드 마운트(bind mount)라는 기능을 제공합니다.
쉽게 말하면 "컨테이너 내부 경로와 Ubuntu의 실제 디렉터리를 연결하는 것" 입니다.
예시: 컨테이너: /app/upload → Ubuntu: /upload
이렇게 연결하면, Spring 애플리케이션은 /app/upload에 저장한다고 생각하지만
실제로는 Ubuntu의 /upload에 파일이 저장됩니다.
5. 정리
Docker 환경에서 파일을 Ubuntu 디렉터리에 저장하는 이유는 다음과 같습니다.
- 컨테이너 삭제/재시작에도 파일을 유지하기 위해
- 배포 과정에서 데이터 유실을 방지하기 위해
- 애플리케이션과 데이터를 분리하기 위해
- 안정적인 운영 및 백업을 위해
이제 Spring에서 업로드 경로를 설정하고 Docker에서 /upload와 연결하는 방법을 살펴보겠습니다.
step001: spring initializr에서 프로젝트를 생성합니다.

step002: intellij에서 프로젝트를 open합니다.

step003: 애플리케이션 환경변수를 local과 dev로 구분해서 정의합니다.
application.properties
spring.application.name=spring-docker-upload

# Tomcat
server.port=8090

# Dev Tools
spring.devtools.restart.enabled=true

# Thymeleaf
spring.thymeleaf.cache=false
spring.thymeleaf.prefix=classpath:/templates/
spring.thymeleaf.check-template-location=true

# profiles active
spring.profiles.active=local
application-local.properties
# file upload path for windows local server
file.upload-dir=c:/upload
file.upload-dir-separator=\\
application-dev.properties
# file upload path for ubuntu dev server
file.upload-dir=/upload
file.upload-dir-separator=/
step004: build.gradle에 jar 테스크 비활성화 설정을 합니다.
jar {
    enabled = false
}
step005: UploadFileService 클래스를 만듭니다.
package com.office.upload;

import org.springframework.beans.factory.annotation.Value;
import org.springframework.stereotype.Service;
import org.springframework.web.multipart.MultipartFile;

import java.io.File;
import java.util.UUID;

@Service
public class UploadFileService {

    // application.properties 값 주입
    @Value("${file.upload-dir}")
    private String uploadDir;

    @Value("${file.upload-dir-separator}")
    private String uploadDirSeparator;

    public String upload(MultipartFile file) {
        System.out.println("[UploadFileService] upload()");

        boolean result = false;

        String fileOriName = file.getOriginalFilename();
        String fileExtension = fileOriName.substring(fileOriName.lastIndexOf("."), fileOriName.length());

        UUID uuid = UUID.randomUUID();
        String uniqueFileName = uuid.toString().replaceAll("-", "");

        File dir = new File(uploadDir);
        if(!dir.exists())
            dir.mkdirs();

        File saveFile = new File(uploadDir + uploadDirSeparator + uniqueFileName + fileExtension);
        try {
            file.transferTo(saveFile);
            result = true;

        } catch (Exception e) {
            e.printStackTrace();

        }

        if (result) {
            System.out.println("[UploadFileService] FILE UPLOAD SUCCESS!!");
            System.out.println("[UploadFileService] FILE NAME: " + (uniqueFileName + fileExtension));
            return uniqueFileName + fileExtension;

        } else {
            System.out.println("[UploadFileService] FILE UPLOAD FAIL!!");
            return null;

        }

    }

}
step006: HomeController 클래스를 만듭니다.
package com.office.upload;

import org.springframework.stereotype.Controller;
import org.springframework.ui.Model;
import org.springframework.web.bind.annotation.GetMapping;
import org.springframework.web.bind.annotation.PostMapping;
import org.springframework.web.bind.annotation.RequestParam;
import org.springframework.web.multipart.MultipartFile;

@Controller
public class HomeController {

    private final UploadFileService uploadFileService;

    public HomeController(UploadFileService uploadFileService) {
        this.uploadFileService = uploadFileService;
    }

    @GetMapping({"", "/"})
    public String home() {
        System.out.println("[HomeController] home()");

        return "home";

    }

    @PostMapping("/upload")
    public String uploadFile(@RequestParam("image") MultipartFile file, Model model) {
        System.out.println("[HomeController] uploadFile()");

        String nextPage = "home";

        String savedFileName = uploadFileService.upload(file);
        if (savedFileName != null) {
            model.addAttribute("imageUrl", "/uploads/" + savedFileName);
        }

        return nextPage;

    }

}
step007: WebMvcConfig 클래스를 만듭니다.
package com.office.upload;

import org.springframework.beans.factory.annotation.Value;
import org.springframework.context.annotation.Configuration;
import org.springframework.web.servlet.config.annotation.EnableWebMvc;
import org.springframework.web.servlet.config.annotation.ResourceHandlerRegistry;
import org.springframework.web.servlet.config.annotation.WebMvcConfigurer;

@Configuration
@EnableWebMvc
public class WebMvcConfig implements WebMvcConfigurer {

    @Value("${file.upload-dir}")
    private String uploadDir;

    @Override
    public void addResourceHandlers(ResourceHandlerRegistry registry) {
        // 업로드한 파일을 /uploads/** URL로 접근 가능하게 설정
        registry.addResourceHandler("/uploads/**")
                .addResourceLocations("file:///" + uploadDir + "/");
    }
}
step008: home.html 을 만듭니다.
<!DOCTYPE html>
<html lang="en" xmlns:th="http://www.thymeleaf.org">
    <head>
        <meta charset="UTF-8">
        <title>Image Upload</title>
    </head>
    <body>
        <h1>Upload an Image</h1>

        <!-- 이미지 업로드 폼 -->
        <form th:action="@{/upload}" method="post" enctype="multipart/form-data">
            <input type="file" name="image" accept="image/*" required>
            <button type="submit">Upload</button>
        </form>

        <!-- 업로드 후 이미지 보여주기 -->
        <div th:if="${imageUrl != null}">
            <h2>Uploaded Image:</h2>
            <img th:src="@{${imageUrl}}" alt="Uploaded Image" style="max-width:500px; max-height:500px;">
        </div>
    </body>
</html>
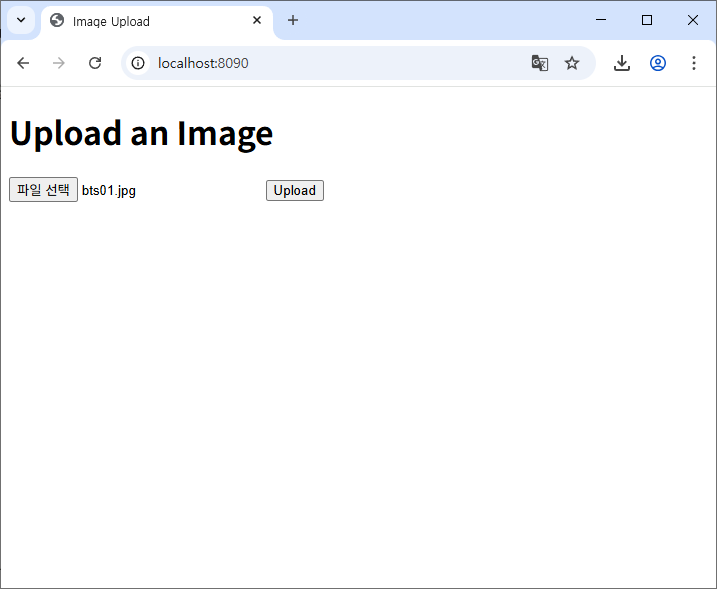
step009: 프로젝트를 실행하고 브라우저에서 "http://localhost:8090/"으로 접속합니다.

step010: 이미지 파일을 업로드하고 "c:/upload"에 파일이 저장된것을 확인합니다.


step011: 프로젝트 실행을 stop하고, applicaton.properties 에서 spring.profiles.active 값을 dev로 변경합니다.
application.properties
# profiles active
spring.profiles.active=dev
step012: github "spring-docker-upload "레파지터리를 만들고 프로젝트를 push합니다.
$ git init

$ git add .

$ git commit -m "commit 00001"

$ git remote add origin https://github.com/taehoedu/spring-docker-upload.git

$ git brach -M main

$ git push origin main

step013: ubuntu 서버를 실행하고 github에서 프로젝트를 clone합니다.
$ git clone https://github.com/taehoedu/spring-docker-upload.git

step014: 현재 사용자 홈 디렉터리(~/)가 아닌, 시스템 루트(/) 경로에 /upload 디렉터리를 생성하고 권한을 설정합니다.
$ cd /
$ sudo mkdir upload
$ sudo chmod 777 upload/
step015: 사용자 홈 디렉터리(~/)로 이동한 후 프로젝트에 Dockerfile을 만듭니다.
Dockerfile
FROM bellsoft/liberica-openjdk-alpine:17

CMD ["./gradlew", "clean", "build"]

VOLUME /tmp

ARG JAR_FILE=build/libs/*.jar

COPY ${JAR_FILE} app.jar

EXPOSE 8090

ENTRYPOINT ["java", "-jar", "/app.jar"]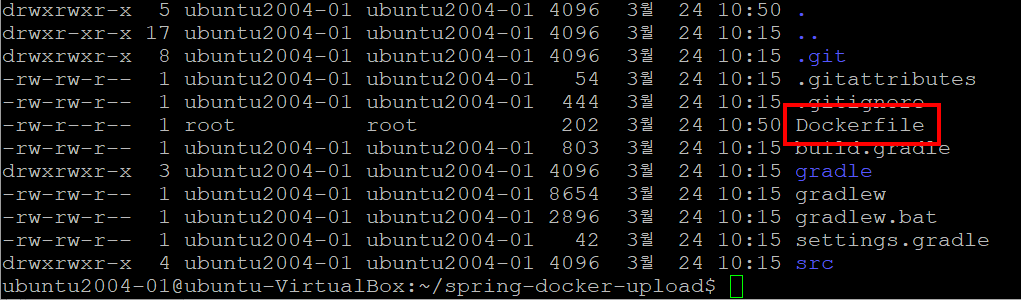
step016: gradlew 파일 권한을 777로 변경하고 프로젝트를 빌드합니다.
$ sudo chmod 777 gradlew
$ sudo ./gradlew clean
$ sudo ./gradlew build
step017: Docker-image를 만듭니다.
$ sudo docker build -t taehoedu/spring-docker-upload:1.0 . - taehoedu: dockerhub 계정ID
- spring-docker-upload: docker-image 이름
- 1.0: 태그

step018: Docker-container를 생성해서 spring boot app을 실행합니다.
$ sudo docker run --name spring \
-d \
-p 8090:8090 \
-v /upload:/upload \
taehoedu/spring-docker-upload:1.0
step019: 브라우저에서 접속한 후 파일을 업로드하고 /upload에 저장되는지 확인합니다.


이번 포스팅에서는 Spring Boot 앱을 Docker로 배포하고, 업로드 파일을 Ubuntu 서버의 /upload 디렉터리에 안전하게 저장하는 방법을 다뤄보았습니다.
핵심 포인트를 정리하면 다음과 같습니다.
- Docker 컨테이너 내부가 아닌 호스트의 /upload 디렉터리에 파일을 저장해야 데이터 유실을 방지할 수 있다.
- 권한 설정을 통해 Spring 앱이 파일을 저장하고, 사용자가 브라우저에서 접근할 수 있게 해야 한다.
- docker run -v /upload:/upload 옵션으로 컨테이너와 호스트 디렉터리 연결이 가능하다.
- -d와 -p 옵션으로 백그라운드 실행과 포트 매핑을 통해 외부 접속도 가능하다.
이번 실습을 통해, 단순히 컨테이너 띄우기에서 끝나는 것이 아니라 파일 관리와 배포 환경 구성까지 연결된 흐름을 이해할 수 있었길 바랍니다.
앞으로 Docker와 Spring을 활용한 실습에서, 데이터 안전과 권한 관리를 항상 염두에 두면 안정적인 서비스를 만들 수 있습니다.
'spring boot' 카테고리의 다른 글
| Docker 환경 MySQL 데이터 백업/복구 방법 (0) | 2026.03.25 |
|---|---|
| Ubuntu에서 Docker 기반 MySQL 환경 구성 및 운영하기 (0) | 2026.03.25 |
| react에서 구글로그인 구현-III(feat. spring) (1) | 2024.12.30 |
| react에서 구글로그인 구현-II(feat. @react-oauth/google) (2) | 2024.12.30 |
| JWT를 이용한 인증-III(feat. react, spring boot, spring security) (1) | 2024.12.28 |